Follow me on Insta @michelealfanodesign

Saturday, April 28, 2012

Designer Spotlight: Wüd Furniture design

d LOLITA BENCH
WALNUT, PB-R (LEAD ENCASED IN RESIN)
Over the years, I have enjoyed going to Dumbo’s annual BKLYN DESIGN’s show and have looked forward to seeing new creations by Corey Springer, founder of Wüd Furniture design, a Brooklyn-based design and manufacturing studio. Fusing artistic innovation with the sculptural is what Springer's work is all about.  Wüd’s tagline is "LIVE WITH IT." And yes you can live with it!: Wüd’s sculptural pieces are hand crafted and crafted with precision so that they endure. You can experience luxurious design; yet still informal, without the worry! Wüd’s artful modern designs combine exceptional joinery with high quality materials like Red Gum Wood, Austrialian Walnut,Macassar Ebony and Pb-R (lead or zinc encased in resin). At the past Architectural Digest 2012 home show, Springer showcased some new pieces like the Nola Bar (pics seen below) with his unique and indestuctible PB-r material. You can see the lead or zinc but you cannot touch, scratch or stain its surface because it is embedded in a case of resilient, smooth resin. Great for any type of countertop! It’s both sleek and industrial-looking! The wood finishing is also amazingly beautiful!!

I really enjoyed seeing Corey again at the Home show and meeting his adorable wife Keren this time. She does all the Wüd marketing and PR. Awesome people, awesome designs! Below please read a great interview with Corey from Wüd Furniture design as he describes his materials, and inspired methods:


AUSTRIALIAN WALNUT MEDIA CABINET:
AUSTRIALIAN WALNUT, HARD MAPLE, HOT ROLLED STEEL ENCASED IN RESIN


AUSTRIALIAN WALNUT DETAIL

RWB SIDEBOARD:
LACQUERED MDF, RED GUM, HARD MAPLE


RWB SIDEBOARD DETAIL WITH PERFORATED ALUMINUM

Interview with Corey Springer, Wüd Furniture Design:

What does Wüd mean? How did you came up with the name of your company?

There is no real meaning behind the name - just a play on words for wood furniture. We came up with the name Wüd during a brainstorming session 10 years ago, drinking wine and sitting around the couch with some family. We wanted a name that was catchy yet unique, and Wüd seemed to fit the bill. It resonated with us instantly.


EBONY BAR:
MACASSAR EBONY, HARD MAPLE, PB-R (STEEL ENCASED IN RESIN)

WUD NOLA BAR:
AUSTRIALIAN WALNUT, BRASS ENCASED IN RESIN, STARPHIRE GLASS
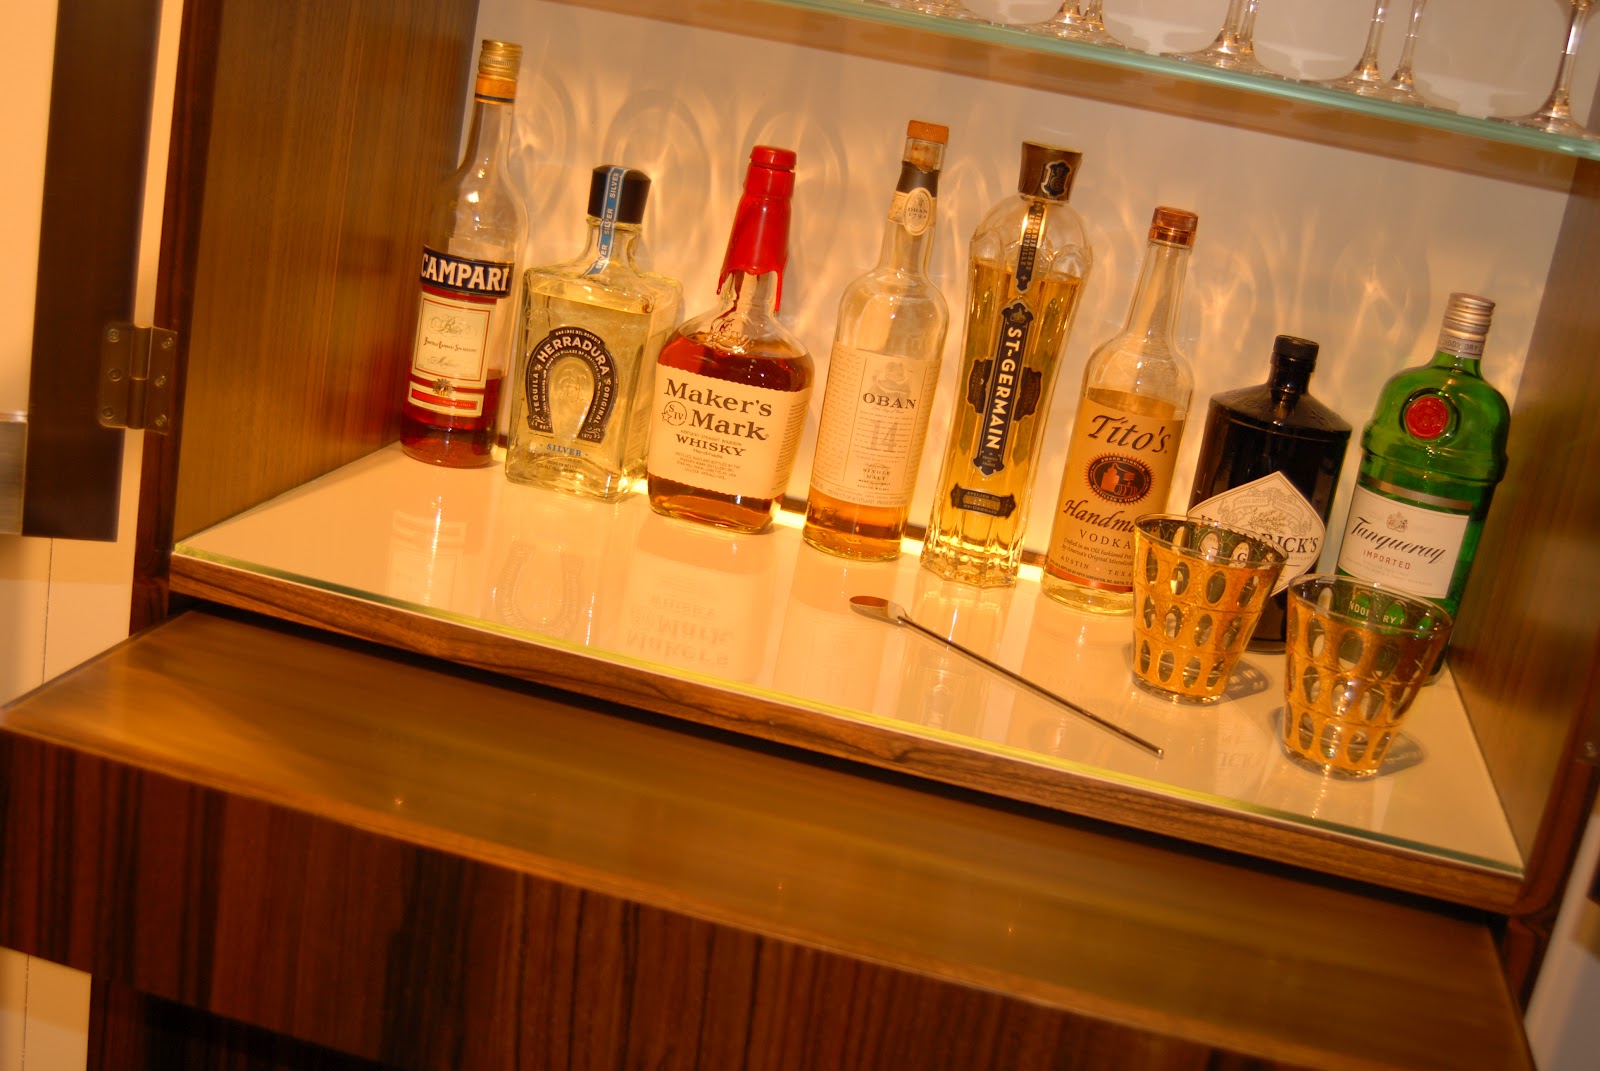
WUD NOLA BAR DETAIL
(SEEN AT ARCHITECTURAL HOME SHOW)
Tell me about your background in sculpture and how your interest in Japanese design influences your furniture making?

I graduated with a degree in sculpture design from the University of Massachusetts.  Upon graduating,  I was determined to pursue my art, but briefly struggled with how to turn it into a living as opposed to a hobby. I decided to take some courses at the New School in Manhattan to help me find the right direction. It was during a product design class that we were asked to design a chair and it was my "lightbulb" moment. I then realized that designing and building furniture was what I wanted to do. It allowed me to pursue my love of design and incorporate my background in sculpture, and truly seemed like the most natural progression. I've always admired Japanese furniture and architecture.  The clean lines,  the simplicity of the designs,  and the beautiful use of wood with other materials, has always spoken to me and found its way into my designs.

GOTTLIEB DESK:
SANTOS REDWOOD, HARD MAPLE, STAINLESS STEEL


GOTTLIEB DESK DETAIL


GOTTLIEB DESK

How would you describe your design aesthetic?

Our aesthetic is modern yet warm - we like to use clean lines and combine it with beautiful rich-colored wood as well as our signature product Pb-R (metal encased in resin). It is really important to me to build high-quality furniture that is elegant yet informal. Our pieces are meant to be used and lived with - they are more than just art.

PB-R TRAY

CLOSEUP OF PB-R ON RED GUM SIDEBOARD

No great designer exists without inspiration. Please take us behind the design of your revolutionary material, Pb-r. How did the design of metal embedded in epoxy resin all come to be? Tell us the inspired story. What fueled your creative process?

Some of Wud Furniture's first designs included metal surfaces, particularly Lead, because of its rich texture and malleability. We quickly realized that we needed to come up with a solution to protect the material from wear and tear, as well as potential hazards in the case of the Lead. After speaking in depth with a co-worker who specialized in resin, we began testing the process of encasing the metal surfaces in epoxy resin. Our first Pb-r client was a young family who loved the look of a metal surface but did not want the hassle of maintaining it. The Pb-r surface has proven to be extremely resilient, smooth and easy to maintain. It really reflects our vision of creating furniture for people to live with. Now, 9 years later, over 75% of our pieces include Pb-r.

PB-R AS A KITCHEN COUNTERTOP

What are your favorite metals and woods you like to work with?

Zinc, steel, walnut, and red gum.

What designs are you most proud of and why?

The Lolita bench, because it really reflects our style, incorporates Pb-R, and has a sculptural feel, making the bench a piece of functional art.


LOLITA BENCH
LOLITA DINING TABLE & BENCH
PB-R LOLITA DOUBLE PEDESTAL DINING TABLE


What are your plans for the Future and beyond?

We plan on continuing to build the Wüd Furniture brand, by incorporating a secondary line that can be sold in retail stores. We also plan on working hard to provide high quality, timeless furniture that reflects our contemporary style.


STERLING MEDIA CABINET:
BLACK WALNUT, ZINC AND RESIN, PEROFRATED ALUMINUM


I am in LOVE with Wüd Furniture Designs!
To contact Wud: Wüd WEBSITE

Thank you Corey for a fantastic interview!
~ M


Friday, April 27, 2012

Ingenious Bronson Wall Divider by Contempo Space


BRONSON ROOM DIVIDER
Looking for the perfect divider for a space with an open floor plan? Well, I have found it! Its the Bronson Room Divider by Contempo Space, a New Jersey based furniture company that designs custom made Modern furniture.  

I saw this unit at the Architectural Digest Home 2012 show, featuring a swiveling centerpiece that houses storage and a flat screen television. This unique piece of furniture ingeniously creates one room into two distinct spaces: on one side, there's a shelving unit; on the other side there's a space for a flat screen television. Then the middle section pivots, this is when you say, 'ooh and aah!' With a flick of the wrist, your television can rotate from one space to the other. The unit has tons of shelving for your cable boxes, video games or whatever accessories your ideal living space may require. It comes in a variety of wood tones, colored glass and mirrored fronts. Contempo will deliver to your home and install upon request. Check out their website and call for pricing: Contempo Space.

Love it!! See pics below on how it operates:


BRONSON ROOM DIVIDER

Sunday, April 22, 2012

Designer Spolight: Rail Yard Studios


At Rail Yard Studios, “preservation and sustainability are our goal,” says father and son team, Jim and Robert Hendrick who uniquely create magnificent one-of-a-kind custom furniture from historical century-old railroad steel and hardwood timbers. Robert owns a railroad company and decided to re-purpose and transform all the imperfect railroad ties that had knots, splits or warps into marvelous furniture, real beauties of combined wood and steel!  What's fascinating are these special pieces made by the same hands that work the railroad, “honest, hard-working blue collar laborers.”

It was a real pleasure meeting the Rail Yard Studio team, owner Robert Hendrick and Erica Edwards at the Architectural digest show! Great people, great designs!The furniture is innovative and has superior attention to detail!  I am very excited about my interview with Robert where he describes his inspired story and creative process:

Robert Hendrick, Rail Yard Studios

Tell me about yourself, and how you were inspired to create Rail Yard Studios after seeing century-old materials being scrapped by your own railroad maintenance and construction company?

It was heart-wrenching to see the old steel with big bold brands and manufacture dates on the side that said CARNEGIE 1898 or TENNESSEE 1911. The crew just recognized it as worn out steel and carted it off to the scrap yard. Later when the economy turned down in 2009 and 2010, the crew needed something to do in between jobs, so I put to use my Industrial Design degrees and had them start building furniture from the century old rail. They thought I was crazy at first, until they saw the finished product. Then they believed.

In three words, how would you describe your signature design aesthetic?

Industrial. Revolution. Revitalized.
DETAIL OF SLEEPER DESK AT ARCHITECTURAL DIGEST SHOW
IPAD STAND - MIX OF THE OLD AND THE NEW!!


No great designer exists without inspiration. Please take us behind the design of your furniture-making.  How did the designs of all come to be? Tell us the inspired stories. What fueled your creative process?

I have lots of favorite designers - Raymond Loewy, Charles and Ray Eames and Frank Lloyd Wright to name a few. Truthfully, the biggest influencer was my father. He works with us at Rail Yard Studios and everyone knows him as "Pop." Growing up, he was constantly renovating the house or building something from interesting scraps of materials he had acquired. As my mom says, "We've been under construction for 50 years," so he has to take the credit and the blame for inspiring this.
 

Can you describe the difficulty and workmanship it takes to construct re-purposed furniture from old railroad and rescued centercut hardwood cross ties?

Railroad is big industry. Tolerances are fairly large. Crossties for example are allowed to vary by 1/2" in their height and width. So while the standard for the tie is 6"x8" one tie may be 5-3/4"x8" and the next one 6-1/4" x 7-7/8". That makes things challenging since we want to retain the outter rough condition of the tie. In addition to that, we use the rejects from the tie plant - the ones that did not meet spec. That means they may vary MORE than 1/2", be split, have big knots, be warped or contain a barkseam or any combination of those flaws. So each tie is different.

The steel is much the same way. Rail wears differently on the ends than in the middle of the rail. Rail that has been used in a curve has a different profile. In any case the 100 years of use deform the head wand create this small lip called "flow." The size, and shape of the flow varies with each piece. So we have to accommodate for those variances in all of our designs.


RAILROAD TRESTLE BED


RAILROAD TRESTLE BED
SLEEPER COFFEE TABLE

SLEEPER COFFEE TABLE

SLEEPER COFFEE TABLE


What are your favorite and most successful designs?

I come up with new favorites all of the time. Probably the longest standing favorites are the Switchpoint Desk and the Triangle Table pieces. They are fairly simple - a characteristic of good design, but also like any good design they were hard to come up with. 
SWITCHPOINT TABLE


TRIANGULAR TABLE
TRAINGLE DETAIL


Thank you Robert for an inspired interview!
Your furniture creations are beautiful!

~M


Friday, April 20, 2012

FREE FRIDAY ADVICE: ELIGIBLE FOR A PAINT CONSULTATION


Choosing Paint Color for Your Home can be tricky! Have you been struggling with several swatches on your wall? Need my help to point you in the right direction?

To be eligible for my help, All you have to do is:
1. Click LIKE on Mod Design Guru Fanpage. Welcome 'MoD'ster, you will receive my weekly posts on design!
2. Post below what you think you might like for the MOOD of the room.
3. Email me pics of your room: moddesignguru@gmail.com so I can see all the other materials and colors in the space.
Look foward to seeing your project!
~M

Sunday, April 15, 2012

FISH INSPIRED COLORS AT SEAWORLD,ORLANDO

Shamu Stadium- One Ocean Show

Seaworld, the world's largest marine-themed park, is an amazing place! We were VIP's for the day and was escorted to amazing live shows featuring dolphins & birds-Blue Horizon show, Shamu (known as the killer whale)-One Ocean show, a hysterical pirate inspired Sea Lion-Otter show and taken behind the scenes where we learned about their animal rescue program. Our tour guide, Ally was extremely informative and told us that Seaworld has saved thousands of marine animals and their goal is to send them back to the wild! She even showed us how Seaworld cares for these sick turtles,dolphins and manatees. It was very impressive. Seeing behind the scenes was incredible!

By the end of the day, I was overwhelmed and inspired by Underwater life's varying colors and patterns. I saw every conceivable variation of color, stripe, spot and texture in plantlife and fish. My wheels were turning, while amazed at all the wonderful colors, how to apply some of these features to an interior application? See some of the wonder below:

 The iridescent colors of this plant life and fish are breath taking in person! Love the curly edges and depth of the plantlife. For an interior application, how about a chic white room with a pop of color using a large fishtank of colorful fish and plantlife? you could also get a large metal tray and arrange different textured plantlife. Would be a soothing addition to any room.


My daughter was able to poke her body inside a chamber of iridescent anenome. Wow the spaghetti stands of orange are uh-mazing! For an interior application, you could accent this orange color against some sandy beiges or creamy colors.


  This dragon fish is cool, looks like lacy lettuce! Love the iridscent lime color! For an interior application, the lime would be a great accent color for a charcoal or chocolate colored room.


This fish was my pal at the Sharks underwater restaurant.  He kept coming by me to hang out. I noticed when the light hits its scales, it displays various metallic and iridscent colors! For an interior application, this goldy metallic would be a cool paint or wallcovering color against dark colored wood!

The varying tones of gray are so pretty on the dolphins. We got to feed them!


Noticing the lovely pale gray while standing below the sting-ray tank.
Did this guy smile at us?


Wednesday, April 11, 2012

GUEST POST - MURALS, MURALS ON THE WALL

Hi Everyone!! !! Today's Guest is Tracie Davis, Muralist, and author of Tiny by design. Take a minute to read all about "Murals,Murals on the wall" and to check out her wonderful site showing her unique mural gallery! Thanks M!!!

Hi Mod Design Guru followers! My name is Tracie and in 2009 I started a business creating art for children called tiny by design. I am so excited to have been invited by the Mod Design Guru herself to write a guest post on murals!

My adventures in murals began rather innocently and perhaps a bit hormonally. You see, I was hugely pregnant. Like most expectant mothers, I wanted a magical place for my new baby to sleep. Always having a knack for art, I decided to take on the nursery myself. Problem was, I had to go gender neutral (we chose the surprise route)…real problem was that I knew once that baby popped out, I would want something specific to a boy or girl. I decided to stay basic with a simple tree in the corner, gender neutral colors and a sweet phrase over the crib. After this first experience painting on a wall, I was in love.

my first mural...and my baby girl

My baby was a girl. Knowing that another baby was in our future, I painstakingly left the room neutral and went a bit nutso when we moved her into a big girl room. Itching to get murals on the wall, I got started right away…on another tree. Not very imaginative, I know. But my daughter was just starting to talk as we transitioned her to her new room. She loved the tree in her room, would always point to it and in that sweet little voice of hers she would say “chee, chee”. Hormonal again from baby number two, I felt guilty for moving her from her tree…so whalla – another tree.

Soon after came some bugs and a phrase….


Followed by a castle…

And then Toy Story…(I know Toy Story doesn’t really go with the castle and the tree . . . but she went through a Toy Story phase and I only have so many walls in my house)

When my son was born, I was quick to “man up” his tree and add some wildlife to his room.

Like a bear…

A moose…

And a buck…


Somewhere in all this tree painting chaos came the idea to do this for a living. Wanting to add some knowledge to my love of painting murals, I bought some books. I credit my process to two books in particular: “How to Start a Faux Painting or Mural Business” by Rebecca Pittman for the business aspect and “Creative Kids’ Murals You Can Paint” by Suzanne Whitaker for learning the “proper” materials.


Here are some basic tips that I learned are necessary for painting the best murals you can paint (and I happen to believe that everyone is capable of creating beautiful murals for any room). I broke them into four categories – plan ahead, practice on paper, use your favorite materials, paint from your heart . . . or the hearts of the ones you are painting for.

a few of my favorite materials


1 Plan Ahead
I personally don’t get too caught up in the exact measurements of the wall, but I do make sure my sketches are proportional. Make note of door and window placement and decide how and/or if they should play a role in the mural.

Some examples:

this window was included as a part of the castle, paint was mixed to match the curtains and the frames made great windows on the side towers

the branches on this tree disappear behind this window. the shadowing was done to reflect light coming from the window and the branches are flowing as if a breeze were coming through the screen.


2 Practice on Paper

Thank goodness for a sweet little invention called a projector. Because of this little wonder, transferring murals to the wall is effortless. The first few murals I did were freehand on the wall…and I held my breath the entire time. I was so nervous to make any decisions for fear that I would run into problems. Now, thanks to my “Kwick Draw” projector, I can simply project my sketches onto the wall and draw them in place. You can make them bigger or smaller and adjust them to get perfect positioning for the room. I have a cheapo projector (less than $100) and truthfully it is all I will ever need. My “Kwick Draw”(you gotta love the name) can project images from up to a 6x6 sketch. For simple murals, I draw images on a 6x6 paper and project them to the size I want. For bigger, more detailed or more complex murals I draw them in the size I need, cut the sketch into 6x6 sections and project it one section at a time until the entire drawing is on the wall. The greatest thing is I can practice on paper as long as I need and make the bazillion changes necessary to get it just right!

3 Use the Your Favorite Materials
Here are a few of mine:
Polyacrylic

The best little piece of advice I took from the Suzanne Whitaker, Creative Kids’ Murals You Can Paint, is to mix all the paint with polyacrylic (roughly a 50:50 ratio – depending on the desired consistency). First, it saves on resources by getting more mileage out of your paint. More importantly, it makes the paint flow beautifully. Ughhhh, I didn’t know this when I painted the white castle my daughter’s wall. I really struggled to blend the towers evenly (white can be tricky to work with!) and they were so big that the paint dried too quickly for me to keep up. It took a crazy amount of time and paint to finish this project – and I now know it would have cut down significantly had I used polyacrylic with my paint. Oh well, hindsight is 20:20 as they say!

Drop cloth

Okay, I am almost embarrassed to put this obvious item in this post. However, I got a tad lazy while painting the Toy Story mural in my daughter’s room. My excuse is that I was painting in tiny snippets while the kids were occupied, but really I just got lazy. One day, my daughter knocked over the open can of polyacrylic and it spilled on the carpet. Let’s just say, it doesn’t clean up so easily…and leave it at that. Actually, let’s just leave it at “if you want to hire me, don’t worry, I will always use a drop cloth!”


Paint

Any combination of acrylic and latex paints will work. I started this whole process using cheap acrylic craft paint from Walmart. The murals I painted with it are still intact, have been wiped down from handprint marks and still look as vibrant as the day I painted them (and I would know, because they are in my house!) When I started doing murals in customers’ homes, I upgraded to Liquitex soft body acrylics (which most of the books recommended) and am happy with the quality and the vast selection of colors. This brand can be found in most craft stores. I purchase mine from www.dickblick.com. Blick art materials are delivered crazy quick, they have outstanding customer service and the lowest prices you can find.

Brushes
I am not one to spend a ton on brushes for murals. Mural painting is hard on brushes so I prefer to go cheap and replace frequently. Some of my mural favs are Blick Mega White Synthetic Brushes for bigger areas and I love the Robert Simmons Expressions Brushes. I discovered them when I was offered a free wash brush with an order I placed with Dick Blick. I used this same brush on all my murals to date. I have since ordered this brand in different sizes and have been very happy with them. They tend to be my go to brushes, although I do use a wide variety.

Special effects stuff

I like to use old burp rags as clothes to make a muted whimsy look. Sponges also come in handy for creating cool textures. I also always have rulers, tape and a level on hand to ensure my lines are straight.
the soft branches in this willow tree were created by using a wet burp rag (aka disposable diaper)

I used blue painters tape to help keep my lines straight on the castle

4 Paint from your heart . . . or the heart of the ones you are creating for

Murals are a perfect way to transform a room. I specialize in kids’ rooms and truly believe that artwork can help bring tiny imaginations to life. I have the beautiful opportunity to see this everyday as my kids “interact” with the paintings on their walls. These genuine and innocent reactions are why I passionately do what I do.
my boy hugging his "moosey" before bed - every night

my girl in her "I will dress myself phase" talking to her owls

I would love to hear from you! Questions, thoughts, comments…please feel free to leave a comment here or send a message to traciedavis@tinybydesign.com. There are also more murals and lots of canvas art examples on my website www.tinybydesign.com. Thank you for reading!
Tracie Davis
tiny by design